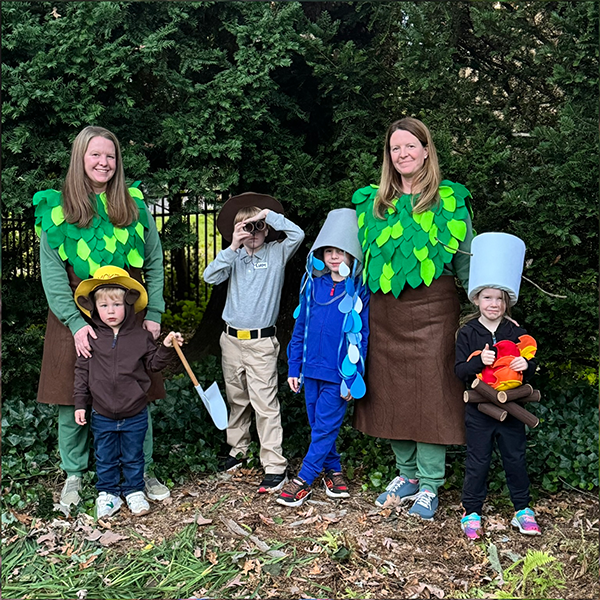
Smokey Bear Group
Materials
For Smokey Bear:
- One brown kids hoodie
- One denim kids bottom
- Yellow craft foam, two 12x18” sheets
- Red marker
- Brown felt
- Pin backs
- Black felt
- Wooden dowel
- White craft foam
- Silver paint
For the Park Ranger:
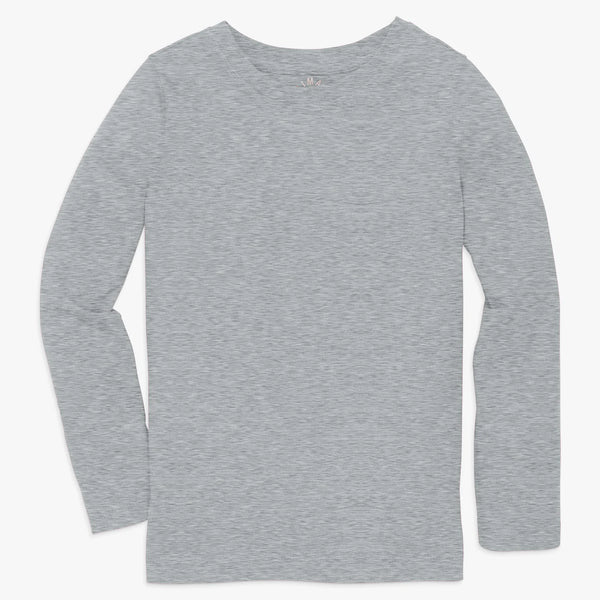
- One gray kids top
- One tan kids bottom
- Dark brown felt
- Medium brown felt
- Black felt
- Yellow felt
- Poster board
- Green felt
- White felt
- Black marker
- Empty paper towel tube
- Black cardstock paper
- Clear tape
- Black string
- Small black pom pom
Water bucket:
- One blue kids hoodie
- One blue kids bottom
- Poster board
- Light gray felt
- Small piece of upholstery foam
- White elastic band
- Clear string
- Blue & white craft foam sheets
- Blue & silver ribbon
For the Campfire:
- One black kids hoodie
- One black kids bottom
- White craft foam sheet
- White stretchy knit fabric
- Upholstery foam
- Red felt
- Orange felt
- Yellow felt
- Dark brown felt
- Tan felt
- Black marker
- Stuffing
- Empty paper towel tubes
- Black elastic band, 1” wide
- Small tree branch
For the Tree:
- One green grown-up outfit
- Green felt in 2 shades
- Brown felt
- Black marker
- Safety pin
Tools
- Hot glue gun & sticks
- Paint brush
- Scissors
- Pencil
- Tapestry needle
Instructions
For Smokey Bear:
- Create the hat:
- Draw a large rounded oval onto a sheet of yellow craft foam, and a smaller oval in the center that’s large enough to fit the child’s head.
- Cut along the drawn lines, being careful to cut the center oval out cleanly. This piece will be used for the top of the hat.
- Cut a long strip of yellow craft foam for the sides of the hat and glue another strip to lengthen it if necessary.
- Cut short tabs along one long edge of the long strip. Fold and glue these tabs under the inner circle cut of the brim of the hat to attach it together.
- Glue the smaller oval to the top of the hat.
- Cut a thinner strip of craft foam to make the hat band.
- Use a red marker to write “SMOKEY” in the center of this band.
- Glue the band around the hat.
- Create the ears:
- Cut two layers of brown felt for each ear. Make the ears small and rounded.
- Cut a vertical slit from the bottom center of each ear. Fold these cut edges over each other criss crossed to give the ear some shape & glue.
- Glue pin backs to the back of each ear.
- Make the belt:
- Cut a long strip of black felt that fits around the waist.
- Cut a rectangle belt buckle from a scrap of yellow craft foam & glue it to one end of the belt.
- Attach the belt around the waist with fabric tape.
- Create the shovel:
- Cut a pointed shovel head shape from white craft foam with a rectangle strip along the bottom center. This piece will wrap around the top of the dowel.
- Place the dowel about ⅓ up from the bottom of the shovel head edge. Glue the shovel to the dowel just halfway around the width of the dowel.
- Glue the rectangle strip wrapped around the dowel.
- Bend the shovel head slightly forward to mimic the shape of a real shovel.
- Paint the shovel head with silver metallic paint.
For the Park Ranger:
- Create the hat
- Draw a large rounded oval onto a sheet of poster board, and a smaller oval in the center that’s large enough to fit the child’s head.
- Cut along the drawn lines, being careful to cut the center oval out cleanly. This piece will be used for the top of the hat.
- Use this cutout ring and smaller oval to trace the same pattern onto dark brown felt. Cut two matching felt rings and one oval, and set aside.
- Cut a long strip of poster board for the sides of the hat, and cut a strip of dark brown felt to match.
- Cut short tabs along one long edge of the long strip. Fold and glue these tabs under the inner circle cut of the brim ring to attach it together.
- Glue the smaller poster board oval to the top of the hat.
- Glue the dark brown felt pieces that were cut out earlier, onto the hat to cover it.
- Cut a thinner strip of medium brown felt to make the hat band.
- Glue the band around the hat.
- Glue two long strands of black string to either side of the inner hat to make the hat ties.
- Thread the ends of the hat ties through a tapestry needle and push it through the center of a small black pom pom. The ties are now adjustable.
- Create the arm patches
- Cut out two shield shapes from brown felt.
- Cut out two green felt pine trees and glue them to each brown patch.
- Attach these patches to the upper arms with fabric tape.
- Create the name tag
- Cut a small rectangle from white felt.
- Use a black marker to write the child’s name onto the felt.
- Attach this tag to the left upper chest with fabric tape.
- Make the belt
- Cut a long strip of black felt that fits around the waist.
- Cut a rectangle belt buckle from a scrap of yellow felt & glue it to one end of the belt.
- Attach the belt around the waist with fabric tape.
- Create the binoculars
- Cut an empty paper towel tube in half.
- Use black cardstock paper & clear tape to cover each tube.
- Glue two strips of black cardstock to connect the tubes together.
- Glue black string to the binoculars to hold it around the neck.
Water bucket:
- Create the bucket
- Roll a sheet of poster board into a slightly tapered tube and glue it together.
- Trim the top and bottom edges of the tube to create a bucket shape.
- Glue a circle of poster board to the smaller “bottom” end of the bucket.
- Cover the bucket with light gray felt.
- Cut a circle from upholstery foam for the inside of the bucket to make a base for the top of the child’s head. Cover it with light gray felt and stuff it inside the bucket. Try it on the child’s head and hot glue it in place where it feels comfortable.
- Glue a strip of white elastic to make a chin strap inside the bucket.
- Create the water drops
- Glue 6 long strands of clear string around the inside edge of the bucket.
- Cut and glue a few blue craft foam water droplets onto each string using super glue.
- Glue silver and blue ribbon around the inside edge of the bucket.
For the Campfire:
- Create the marshmallow hat
- Cut a length of upholstery foam that will fit comfortably around the child’s head when rolled into a tube shape.
- Hot glue the ends of the foam together to form a cylinder.
- Cover the foam hat with white knit fabric, tucking the ends to the inside of the hat.
- Glue a circle of white craft foam to the top.
- Use scissors to make a small hole on either side of the hat for the tree branch.
- Break the branch in half and hot glue each piece on either side of the hat.
- Create the logs
- Cut one paper towel tube in half and cover the long section of all the tubes with dark brown felt.
- Glue circles of tan felt over the ends of the tubes.
- Use a black marker to draw tree rings on the tan log ends, and lines along the dark brown wood sections.
- Hot glue the logs together criss crossed and piled together.
- Create the fire
- Cut and stuff fire flames from yellow, orange, & red felt. Glue the flames together and then to the back top section of the logs.
- Glue a black elastic band to the back of the campfire to hold it around the child’s waist.
For the Tree:
- Create the leaves poncho
- Cut a poncho from green felt.
- Cut and glue leaves in two shades of green felt layered on top of the poncho, starting at the bottom and working your way up to the neckline.
- Create the tree trunk
- Cut a length of brown felt enough to wrap around the wearer’s waist.
- Use a black marker to draw vertical tree trunk lines onto the felt.
- Safety pin the trunk “skirt” around the waist in the back.


