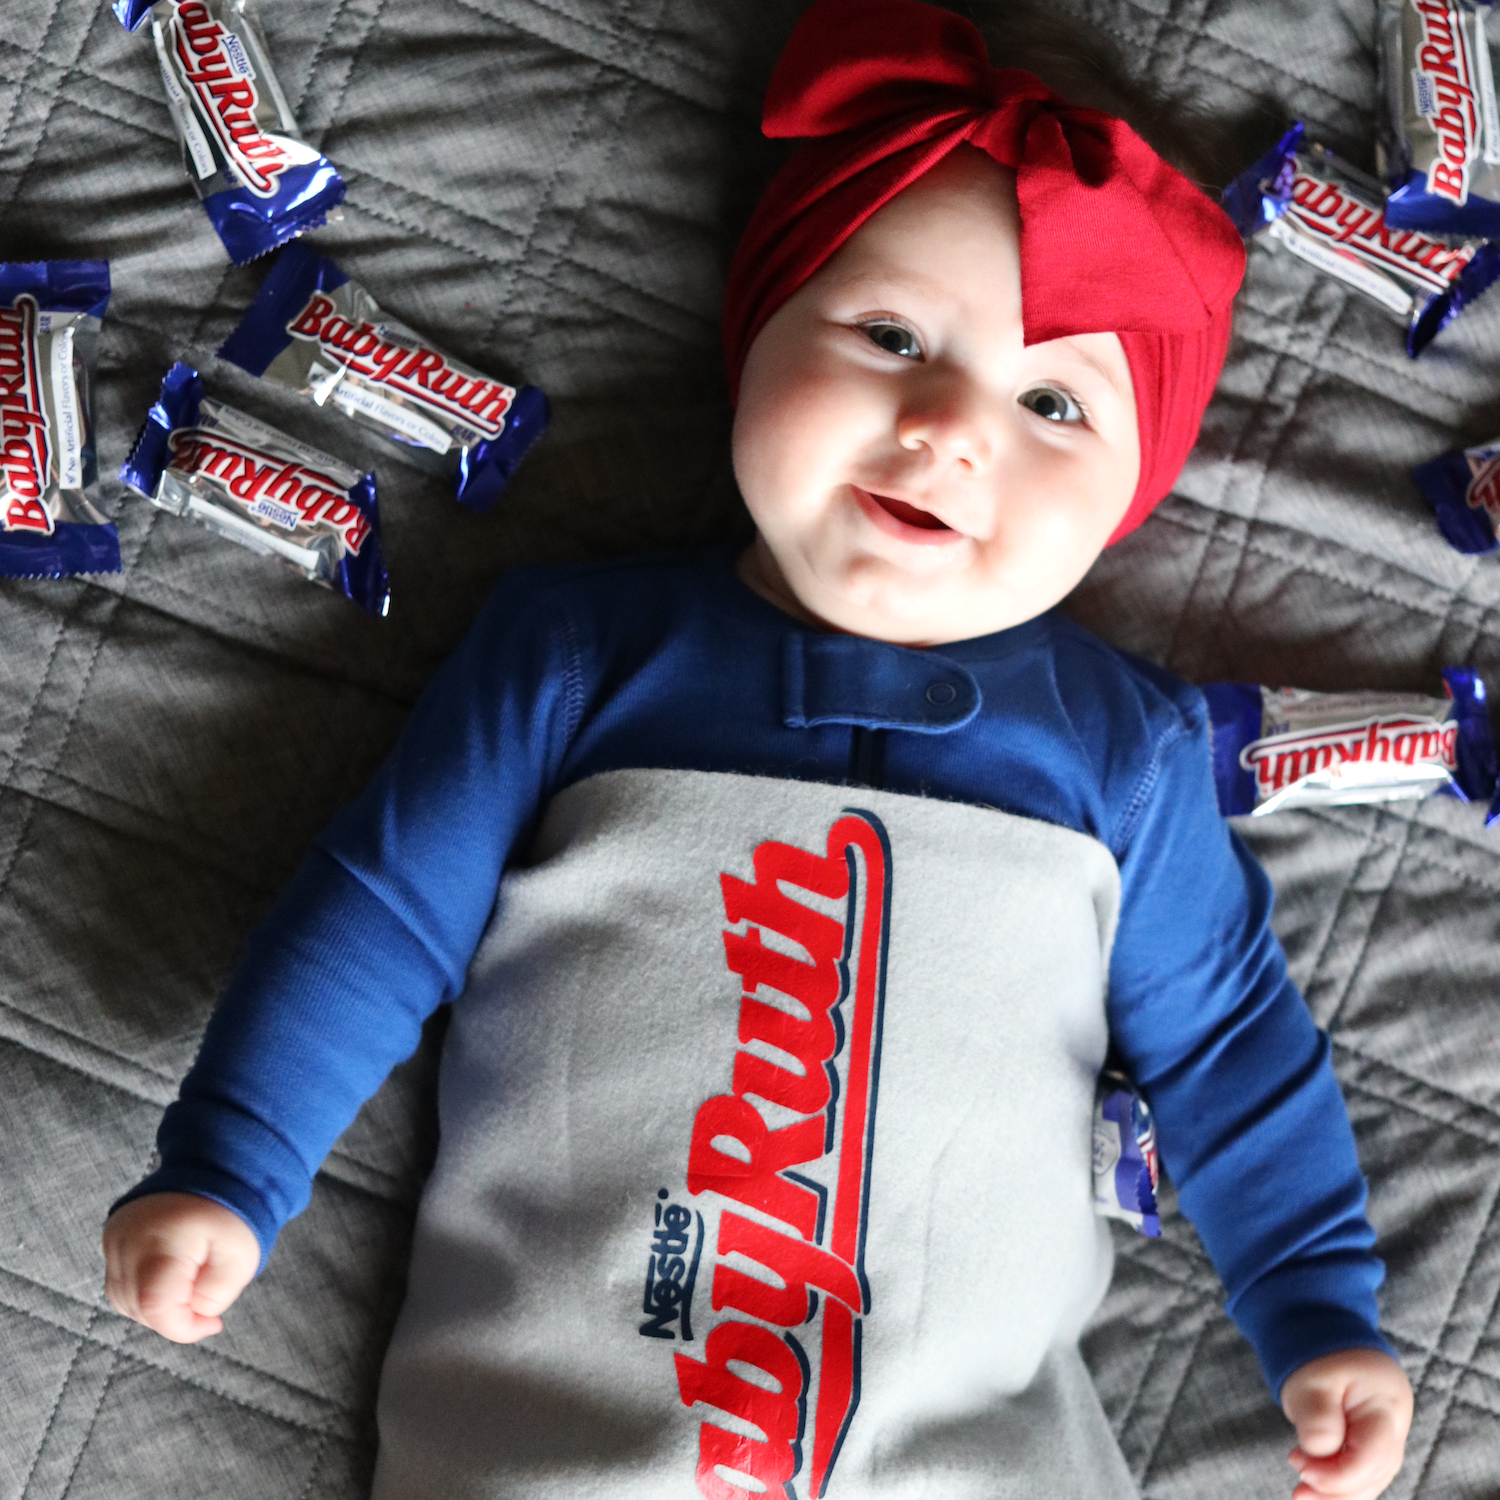
Image: @sothompsonlauren
Products you’ll need (3)


Baby Ruth
-
Has instructions
-
No-sew
Products you’ll need (3)
Materials
- One blue baby outfit
- One red bow
- 2 sheets of grey felt 9x12”
- Red and navy blue HTV vinyl
Tools
- Hot glue gun and sticks
- Cricut maker
- 2 strips of self-adhesive velcro
Instructions
Dress up your little one in a costume that's as sweet and nutty as they are, with our Primary DIY Baby Ruth costume! They may not be ready to be a full trick-or-treater, but with our Primary essentials and some easy DIY steps, no one will be left wondering which Halloween candy is the best, or the cutest. This costume is too good to be t-Ruth!
For the logo:
- Download a .png version of the Baby Ruth logo.
- Upload your Baby Ruth logo into Cricut Design Space and create two versions: the main red text in red, and the outline/shadow in navy blue.
- If you don't have a Cricut Maker, print out the logo on sticker paper!
For the headband:
- Sew your own bow.
- Or buy a cute red one!
For the gray wrapper:
- Place two grey sheets of felt long sides together and sew on one edge using a ¼” seam allowance.
- Place wrapper under your child’s arms to see where the pieces of felt overlap. The seam you just sewed should face in towards your child. Take Velcro strips and temporarily place so that the wrapper flaps close comfortably in the back.
- Remove the wrapper from your child and use hot glue to secure velcro onto the gray felt to make sure it won’t fall off with your child’s movement.
- Center your logo on the front of the wrapper and iron on.
Pro-Tips
- Have other little ones that want to be sweet treats while they eat sweet treats this Halloween? Check out our DIY Cotton Candy, DIY Candy Dots, DIY Good and Plenty, DIY S'mores, and DIY baby Haribo Gummy Bear costumes!